
I had a 2006 Ford Ranger towed into our shop with the complaint of the transmission slipping in both forward and reverse ranges. The truck was a 4 wheel drive and equipped with the 4.0 engine and a 5R55E transmission. This was a fleet vehicle with 201k miles on the odometer. Upon initial road test and analysis, the transmission did indeed slip in both directions. I observed dark and burnt fluid which signaled internal damage requiring replacement of the transmission.
After receiving authorization from the customer, the transmission was removed from the vehicle. Our shop policy includes instructions and a checklist of associated items to check anytime we remove a transmission. One thing that I started doing several years ago was to remove the flex plate for two reasons: 1. inspect the rear main engine oil seal, and 2. inspect the flex plate. When I clean off the surface that mates up to the crankshaft, often times there are signs of stress that will lead to a broken flex plate before it actually occurs. This example was not from this vehicle, but illustrates the point. (Figure 1) Our subject vehicle's flex plate looked good, so the transmission cooler was flushed with a Hot Flush machine and I was ready to install our remanufactured unit into the vehicle. I always use high temp grease on the converter pilot and the dowel pins when installing a transmission.
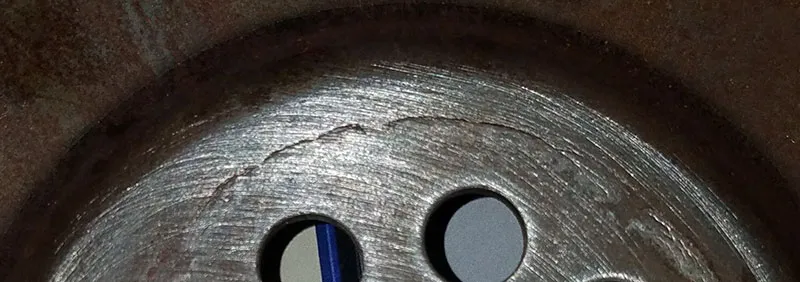
Figure 1
The truck had passed the electrical system analysis, so the PCM was updated with the latest calibration using a J2534 device and the FJDS software. Having completed these tasks, I was ready to road test the vehicle. Our normal road test consists of both in-town and highway driving, and everything was working as expected. The truck passed all of our final checks for proper installation. This vehicle was ready to deliver to the customer to be put back in service.
Fast-forward about five weeks and 2,000 miles. I received a call from our customer explaining that the truck now had a grinding noise that sounded like it was coming from the bellhousing. I submitted a tow to get the truck back to our shop ASAP to find out what had happened.
When the vehicle arrived at the shop, when attempting to start the truck it emitted a very unpleasant grinding noise. We pushed it into the shop for further inspection. All the bolts were tight, and everything looked like it was supposed to. I then removed the starter for further inspection. When attempting to turn over the engine using a pry bar on the teeth of the flex plate I could see that the flex plate was broken and the transmission would have to be removed for inspection.
After the transmission and flex plate were removed I saw that the entire center was broken out. The converter nuts and flex plate bolts were all tight, nothing was pinched in the bellhousing, the dowel pins and the holes in the case were in good shape, so this lead me to suspect some type of alignment issue. I removed the torque converter and sent it to our converter shop to have it checked.
The converter passed inspection, but a remanufactured converter was sent to replace it just to be sure. With no root cause for the breakage yet identified, I had to determine what may have broken the flex plate in such a short amount of time. I ordered a new flex plate and crankshaft spacer due to damage from the broken flex plate. The backing plate between the engine and transmission was inspected for signs of distortion. I broke out the dial indicator to check crankshaft endplay and runout.
The crankshaft endplay spec is between .002-.0126" and was within that spec, as was the runout. (Figure 2) Still left without any direct cause identified, I was thinking that maybe the flywheel was just stressed from the 200k miles of service, but I had to be sure. I brought out the straight edge and checked the face of the transmission which mates to the engine. Again, everything checked out good. Next I checked the rear of the engine block which mates to the transmission. As the straight edge was moving down the rear of the engine to the oil pan it stopped; the engine oil pan seemed to be projecting out past the engine block mating surface! (Figures 3 & 4)
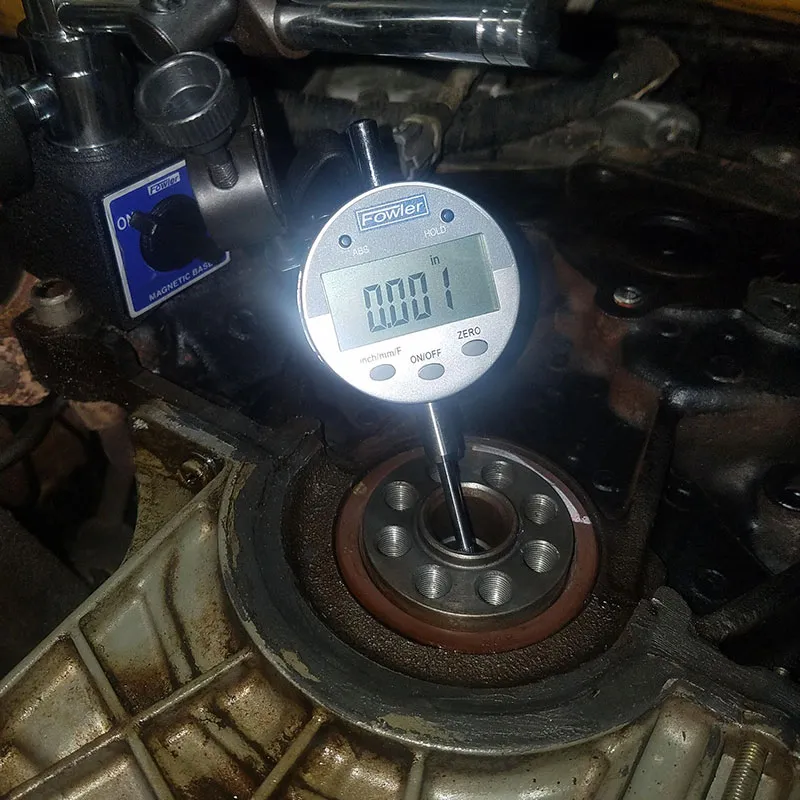
Figure 2
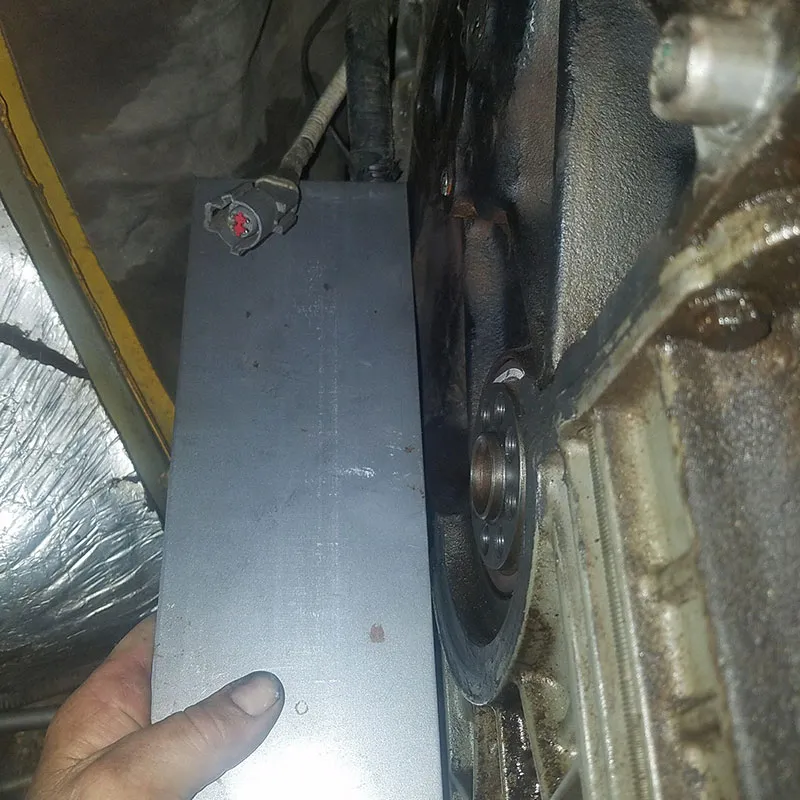
Figure 3
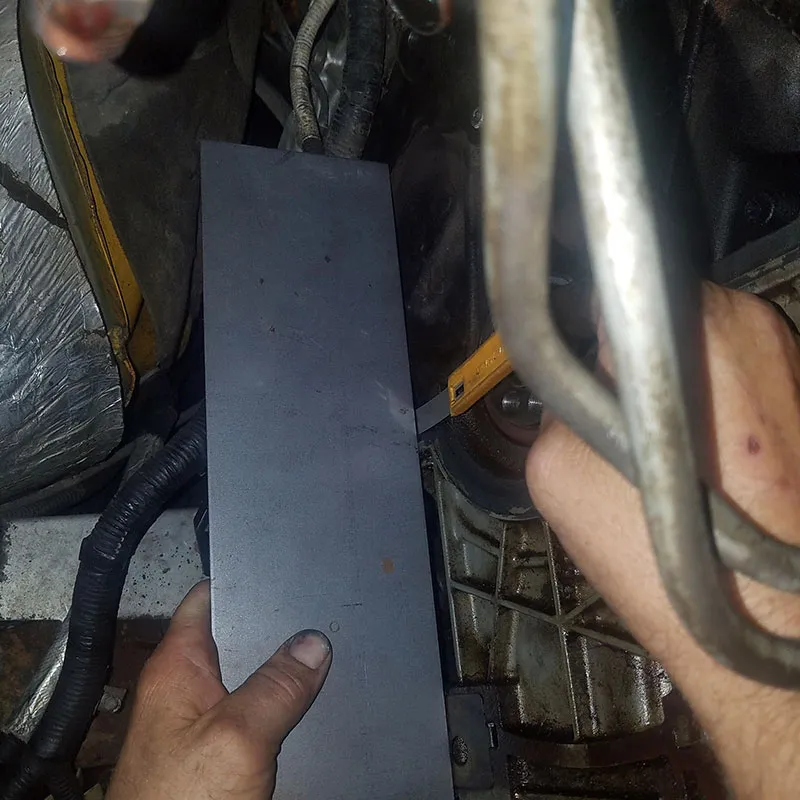
Figure 4
This was a problem since the transmission also mates to the engine oil pan, but couldn't explain why is it hadn't broken the flex plate prior to the transmission replacement. A phone call to the customer explaining what I found shed some light on the situation. The customer explained to us that a short time after I installed our transmission it went to another repair shop for engine work. The engine had been removed and one of the repairs involved the engine oil pan being removed. At this point I received authorization to remove the oil pan and inspect.
I had found upon removing the oil pan that the oil pan bolts had enough wiggle room in the bolt holes to shift the pan past the mating surface of the block. I installed a new pan gasket with a straight edge at the back of the block to make sure the oil pan was flush. I installed the new adapter and flex plate and proceeded to install the transmission. Once the installation was completed and double checked, the truck was road tested several times and brought back in to check for noises and leaks. The truck was returned to our customer in good working order. It has been five months since the repairs were done on this truck, and no further flex plate problems have arisen. The truck is still in service and is seen occasionally driving by the shop.